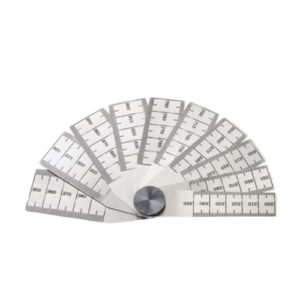
Plastigauge PL-B
FOR MEASUREMENTS OF: 0.004″ to 0.010″ (0.100mm – 0.250mm)
CONTENTS: 100 gauges, measurement reading cards (mm & inches) & instructions
PLASTIGAUGE is a precision clearance gauge for the measurement of clearance (separation) between fitted surfaces. It is particularly useful for measuring clearances in split bearings or in situations where a feeler gauge cannot be inserted.
PLASTIGAUGE is particularly effective for the measurement of separation in moulding tools and wherever it is required to determine the separation between hidden surfaces.
PLASTIGAUGE may be used to detect high spots in cylinder heads, pipe flanges etc. It is useful in production, inspection and servicing.
Plastigauge PL-C
FOR MEASUREMENTS OF: 0.007″ to 0.020″ (0.175mm – 0.500mm)
CONTENTS: 100 gauges, measurement reading cards (mm & inches) & instructions
PLASTIGAUGE is a precision clearance gauge for the measurement of clearance (separation) between fitted surfaces. It is particularly useful for measuring clearances in split bearings or in situations where a feeler gauge cannot be inserted.
PLASTIGAUGE is particularly effective for the measurement of separation in moulding tools and wherever it is required to determine the separation between hidden surfaces.
PLASTIGAUGE is a precision clearance gauge for the measurement of clearance (separation) between fitted surfaces. It is particularly useful for measuring clearances in split bearings or in situations where a feeler gauge cannot be inserted.
PLASTIGAUGE is particularly effective for the measurement of separation in moulding tools and wherever it is required to determine the separation between hidden surfaces.
PLASTIGAUGE may be used to detect high spots in cylinder heads, pipe flanges etc. It is useful in production, inspection and servicing.
Plastigauge PL-D
FOR MEASUREMENTS OF: 0.020″ to 0.040″ (0.500mm – 1.00mm)
CONTENTS: 30 gauges, measurement reading cards (mm & inches) & instructions
PLASTIGAUGE is a precision clearance gauge for the measurement of clearance (separation) between fitted surfaces. It is particularly useful for measuring clearances in split bearings or in situations where a feeler gauge cannot be inserted.
PLASTIGAUGE is particularly effective for the measurement of separation in moulding tools and wherever it is required to determine the separation between hidden surface
PLASTIGAUGE is a precision clearance gauge for the measurement of clearance (separation) between fitted surfaces. It is particularly useful for measuring clearances in split bearings or in situations where a feeler gauge cannot be inserted.
PLASTIGAUGE is particularly effective for the measurement of separation in moulding tools and wherever it is required to determine the separation between hidden surfaces.
PLASTIGAUGE may be used to detect high spots in cylinder heads, pipe flanges etc. It is useful in production, inspection and servicing.
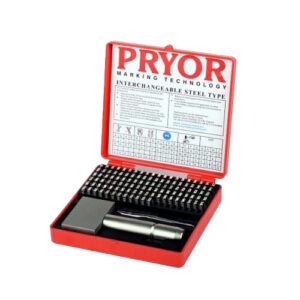
Pryor Interchangeable Punch Set – Alphanumeric Steel Type Marking Sets
Pryor Interchangeable Punch Set – Alphanumeric Steel Type Marking Sets
Making a mark with Steel Type Sets saves time – simply build an inscription into the slot in the Holder and in just one stroke, a series of letters and figures can be indented with uniform legibility.
Hand Holders designed to provide accurate Type location and positive locking. Simply adjust the grub screw with the Allen Key provided for quick inscription change.
Safety Grip available as an accessory to work with Hand Holders allows the user to make a controlled and confident strike by keeping the fingers at a safe distance, reducing the risk of injury and assisting in making a good quality mark.
Steel Type with uniformity of blank size, character position and depth from one piece to another allows a straight, consistent quality mark to be made on a range of materials including metal and plastic up to a maximum hardness of 37 Rockwell C
Individual Characters, plus Sets of Letters & Figures, Number Kits and Holders are all available to purchase should the composition of this set not match your needs.
Manufactured under stringent BS EN ISO 9001:2008 quality controls and exacting standards.
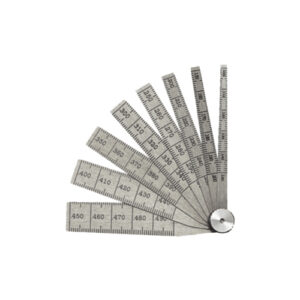
Starrett 269A Taper Guage
FEATURES
These gages are for determining hole sizes in dies and all kinds of other work
Quick, accurate measurement of hole and slot sizes
Made of tempered steel with a locking device for fixing any leaf in position for use
.100-.500
SPECIFICATIONS
Range (in): .100-.500″
Length (in): 2-1/2″
Number of Leaves: 8
Starrett 269B Taper Guage
FEATURES
These gauges are for determining hole sizes in dies and all kinds of other work
Quick, accurate measurement of hole and slot sizes
Made of tempered steel with a locking device for fixing any leaf in position for use
.500-1″
SPECIFICATIONS
Range (in): .500-1″
Length (in): 2-3/4″
Number of Leaves: 10
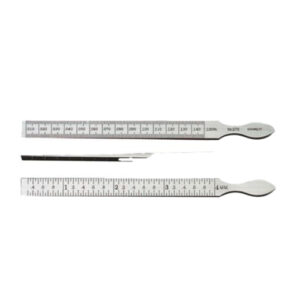
Starrett 270 Taper Gauge
FEATURES
Very useful tool for bearing work and for gaging slots
Made of quality tool steel and accurately tapered throughout entire length for quick and convenient measuring
11mm (7/16″) wide by 160mm (6-1/4″) long
Can be used as a precision shim
One side graduated from .010″ to .150″ in thousandths of an inch;
SPECIFICATIONS
Range (in): 010-.150″
Range (mm): 0.3-4mm
Graduations (in): .001″
Graduations (mm): 0.05mm
Length (in): 6-1/4″
Length (mm): 160mm
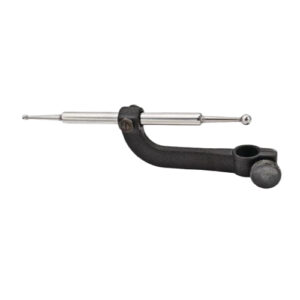
Starrett 670B Indicator Hole Attachment
These hole attachments make it possible to measure the inside of holes and other surfaces that cannot be reached with the regular indicator spindle. Both attachments have a 9.5mm (.375″) diameter hole to fit all indicators made to AGD standards and can be securely clamped to the indicator stem. The ball end on the swivel arm which contacts the work is 3mm (1/8″) in diameter. 14mm (9/16”) Range.
FEATURES
Range (Approx.) 14mm (9/16″)
For Hole Depths to: 42mm (1-11/16″)
SPECIFICATIONS
Range (Approx.) 9/16″ 14mm
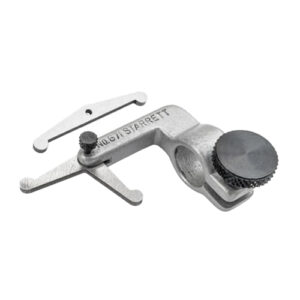
Starrett 671 Universal Attachment for Dial Indicators
The Starrett 671 Universal Attachment is for use with indicators having standard AGD .375″ (9.5mm) stem diameters.
FEATURES
Two interchangeable arms, one straight for measuring internal surfaces and one angular for measuring at right angles to the indicator spindle
SPECIFICATIONS
Range (Approx.) 1/8″ (3mm)
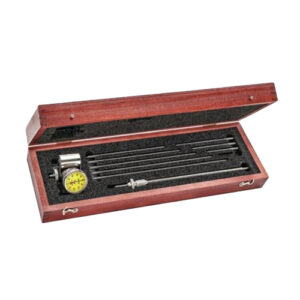
Starrett 696MZ Crankshaft Distortion Dial/Strain Guage
Ideal gage for checking bearing alignment or shaft deflection without dismantling the engine. Also useful as a strain gage on engine frames. This inside measuring gage checks the distortion of crankshaft webs and bears a direct relation to existing misalignment or excessive bearing wear. Used on all diesel engine shafts and center crankshafts on any type of engine or compressor, the gage can also be applied as a strain gage on engine frames while the engine is operating. A comparison of readings taken at top and bottom positions indicates any misalignment of cylinder and frame which results in local over-stress and eventual cracking of the frame neck. Gage with Balancing Attachment, 61-458mm Range neck.
FEATURES
The dial indicator movement is approximately 5/32″ (4mm) and with rods and extension, provides a range from 2 3/8-18″ or 61-458mm
There are 10 rods and one extension furnished
Rods are marked to designate the approximate overall length of the gage
Indicator has a movable bezel to adjust the dial in relation to the hand and a non-breakable crystal
Designed in collaboration with Hartford Steam Boiler. Gage is used by their inspectors to check the distortion of engine shafts and frames
SPECIFICATIONS
Type: Strain Gage
Range (mm): 61 -458mm
Graduations (mm): 0.02mm
Dial Reading: 0-50-0 / 1mm Rev.
Starrett 696Z Crankshaft Distortion Dial/Strain Guage
Ideal gage for checking bearing alignment or shaft deflection without dismantling the engine. Also useful as a strain gage on engine frames. This inside measuring gage checks the distortion of crankshaft webs and bears a direct relation to existing misalignment or excessive bearing wear. Used on all diesel engine shafts and center crankshafts on any type of engine or compressor, the gage can also be applied as a strain gage on engine frames while the engine is operating. A comparison of readings taken at top and bottom positions indicates any misalignment of cylinder and frame which results in local over-stress and eventual cracking of the frame neck. Gage with Balancing Attachment, 2 3/8-18” Range neck
FEATURES
The dial indicator movement is approximately 5/32″ (4mm) and with rods and extension, provides a range from 2 3/8-18″ or 61-458mm
There are 10 rods and one extension furnished
Rods are marked to designate the approximate overall length of the gage
Indicator has a movable bezel to adjust the dial in relation to the hand and a non-breakable crystal
Gage is used by inspectors to check the distortion of engine shafts and frames
SPECIFICATIONS
Type: Strain Gage
Range (in): 2- 3/8″ to 18″
Graduations (in): .001″
Dial Reading: 0-20-0 / .040″ Rev.
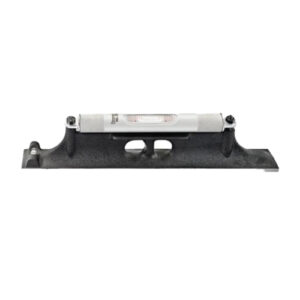
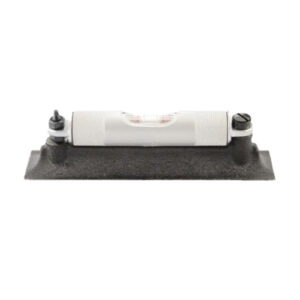
Starrett 98-12 Machinists Level with Ground and Graduated Vial
SKU
The Starrett 98 Machinists Level with Ground and Graduated Vial includes a cross test vial. 300mm (12″) size, without case.
FEATURES
Ground and graduated main vials
The base of the levels features an involute groove running the length of the base, which provides a reliable seat for round work
The base of the levels features an involute groove running the length of the base, which provides a reliable seat for round work
Cross test vial
The vials are adjustable to a positive setting and are housed in a satin finished brass tube with a friction-fit closing cover to prevent breakage
Main level vials have graduations that are approximately 80-90 seconds or .005″ per foot (0.42mm per meter)
SPECIFICATIONS
Length (in): 12″
Length (mm):300MM
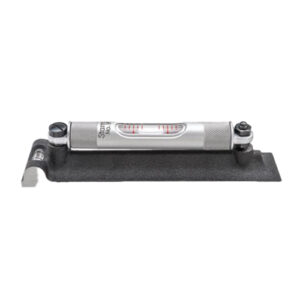
Starrett 98-4 Machinists Level with Ground and Graduated Vial
The Starrett 98 Machinists Level with Ground and Graduated Vial. Does not include a cross test vial. 100mm (4″) size, without case.
FEATURES
These levels have ground and graduated main vials
The base of the levels features an involute groove running the length of the base, which provides a reliable seat for round work
These vials are adjustable to a positive setting and are housed in a satin finished brass tube with a friction-fit closing cover to prevent breakage.
SPECIFICATIONS
Length (in): 4″
Length (mm): 100mm
Starrett 98-6 Machinists Level with Ground and Graduated Vial
The Starrett 98 Machinists Level with Ground and Graduated Vial includes a cross test vial. 150mm (6″) size, without case.
FEATURES
These levels have ground and graduated main vials
The base of the levels features an involute groove running the length of the base, which provides a reliable seat for round work
These vials are adjustable to a positive setting and are housed in a satin finished brass tube with a friction-fit closing cover to prevent breakage.
SPECIFICATIONS
Length (in): 6″
Length (mm):150MM
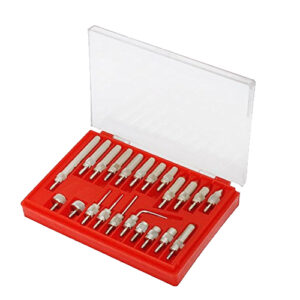
Tip Probe – Contact Point set 22 Pieces / set
Tip Probe / Contact Point set 22 Pieces /set
A complete set of 22 different points, increasing the versatility of your indicators.
High strength and hardness.
Durable for long time use, easy to operate.
Fits for most dial indicators.
A practical accessory for dial indicator.
Material: metal
Color: Silver
Search
Product categories
- Abrasives (0)
- Cutting Tools (2)
- Hand Tools (0)
- Industrial Tools (0)
- Pilers (0)
- Precision Tools (0)
- Safety Products (0)
- Threading Tools (2)
- Tool Stroage (0)
- Tools (48)
- Uncategorized (0)
- Workshop Tools (1)
Filter by price
Product Status
Average rating
Selected static block was removed or unpublished

